This is the second blog post in a series of three. In my previous blog post I described how you can access the data integration feature from different user interfaces. Either from one of the admin centers Power Apps Admin Center or Power Platform Admin Center. You can also go to the Power Apps Web Portal. In this blog post I will describe how to set up a data integration project from the Power Apps Web Portal.
Update 2020-07-08: As part of the 2019 Release Wave 2 Data Integration in Maker Portal was rebranded to Dataflows. This article mentions Data Integration in Power Apps Web Portal, that refers to what we today know as Power Platform Dataflows in Maker Portal.
In our case our source is an onprem source. Therefore the first steps for us was to install the gateway on the SQL server, create an azure gateway resource and create a connection for it. Then we were ready to start with the setup of the data integration projects.
Setting up an integration job in Power Apps Web Portal
First go to the Power Apps Web Portal, Data, Data integration. Then choose New data integration project. Then a page opens where you get to choose a data source.

In our case, since our source is an onprem source on which we have installed a data gateway, we chose SQL Server database. If doing so, then you get to fill in the name of the server and the database and you choose your gateway.

Choosing to connect to an SQL server gives you a list of the tables, you get to choose one or several and on the next page you can see an overview of the columns for each chosen table and also some of the data.
Set up filters and transform data using Power Query
Now here you have the power of Power Query, which gives you a lot of possibilities before you start to set up the data mapping. For example, now you can use Power Query to combine tables, change the format of the columns so that the data fits your destination and you can filter the data.


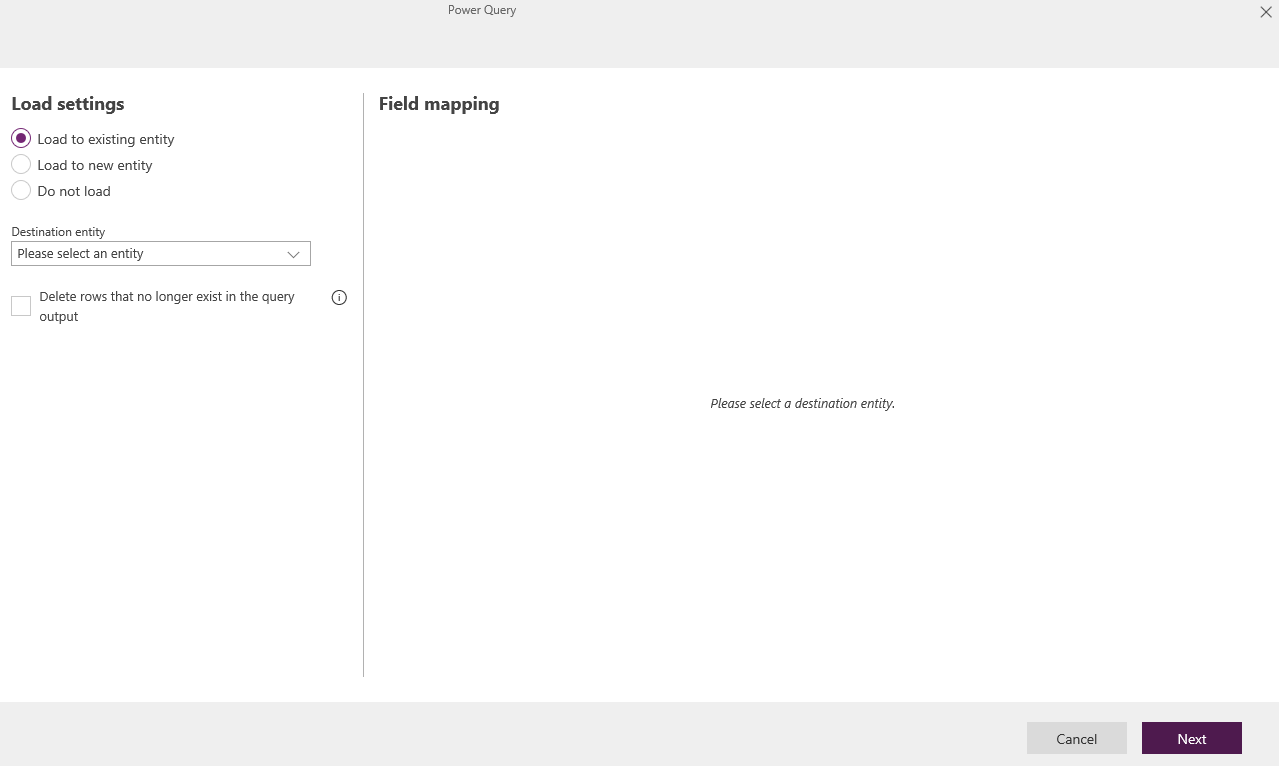
When you are done with the filtering and formatting of the data you go to the next page and there you do the field by field mapping. First you can choose to either write to an existing entity (Load to existing entity) or you can let the platform create an entity for you (Load to new entity). I have only tested to write to existing entities.
You also have a choice to delete rows from your destination, however it comes with a warning that it might impact negatively on the performance. I have not tested this feature. Instead we have chosen to keep all records in our source. For those which are no longer of interest we use a flag in a column and in the destination we deactivate those records automatically.

Once you have chosen an entity the right page (Field mapping) will be updated and display a long list of fields. To the right you have all your destination fields (i.e. the fields of the entity). To the left you specify the source column by column.

I just wrote “all” your destination fields, that is not the whole truth though. Some fields are missing, e.g. status and status reason. For those we have made work arounds, which I will tell you all about in the next blog post where I will summarize my findings.
Run and schedule your data integration projects
When you are done with the field by field mapping you move on to the next page and then you get to run your data integration project for the first time. After that you are able to view the results in the admin center under Data, Data integration and if you want you can schedule your data integration project (from either of the user interfaces).
In my next blog post I will summarize my findings from exploring Data Integration in Power Platform, both general tips and tricks as well as specific mapping details.
See my previous blog post for sources and useful links.


3 thoughts on “Getting started with Data Integration in Power Platform”